Meat Chicken Processing Set Up, Equipment, and Tools
Meat Chicken Processing Set Up, Equipment, and Tools
Chicken Tractor Build Plans
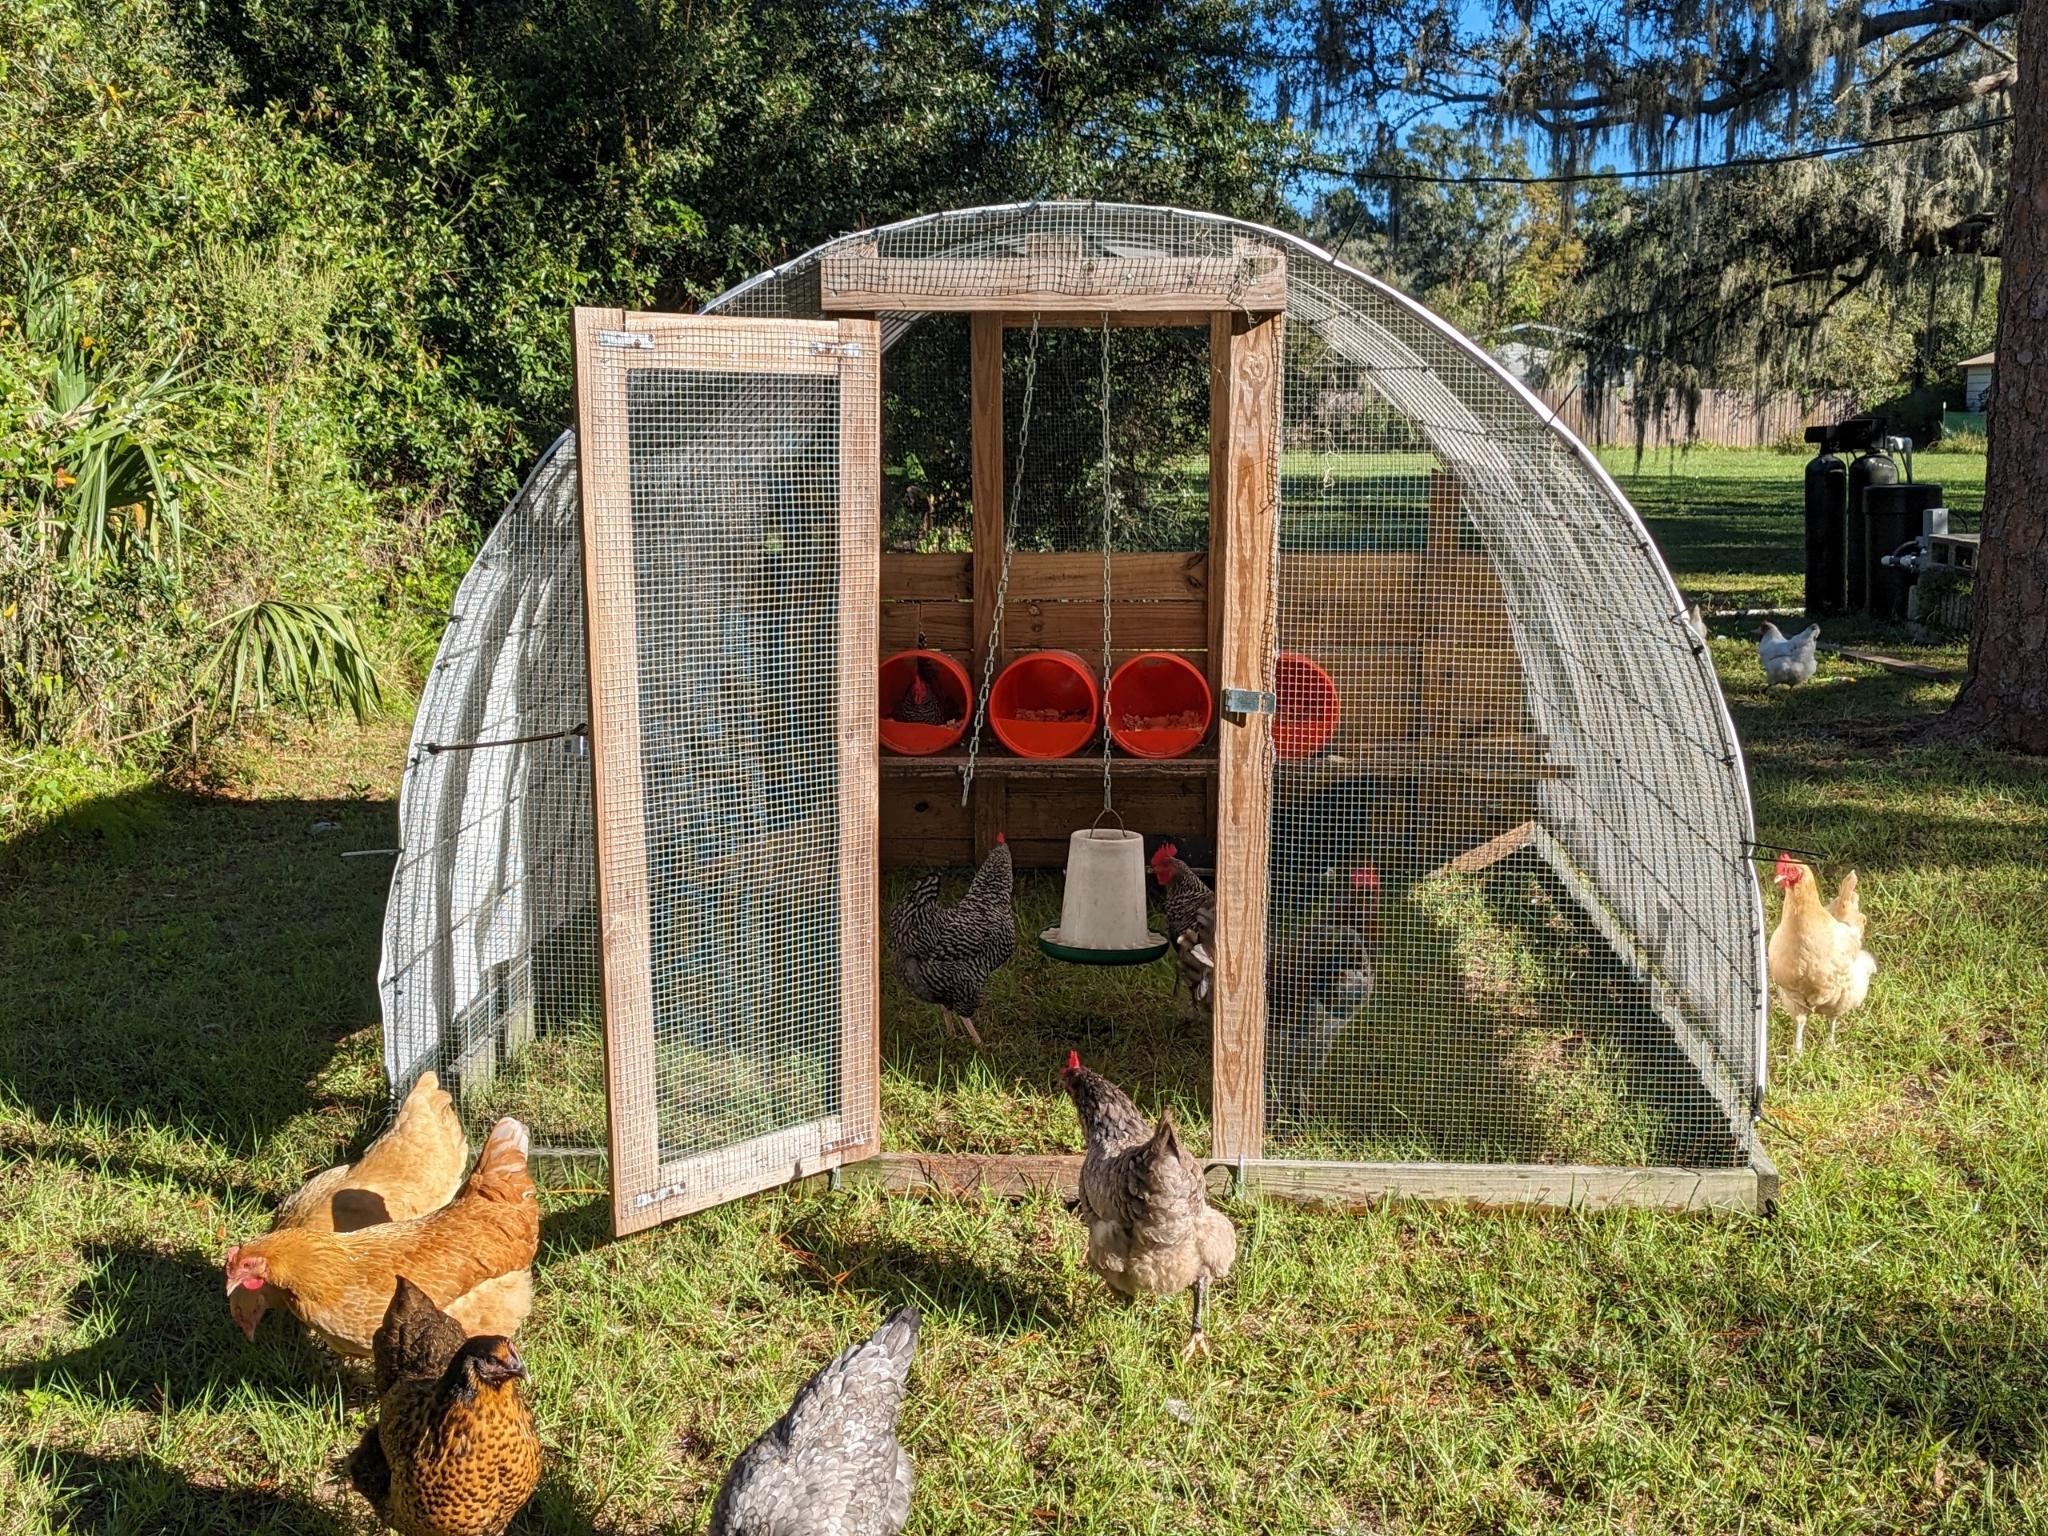
Click here for the plans to build our 8ft x 10ft chicken tractor – perfect for egg layers or meat birds!
Hi, I’m Carisa!

Come along with our family as we learn more about homesteading & self sufficiency as we go.
Having an efficient chicken processing set up is key to a successful meat chicken butchering day! Not only do you need the right equipment to get the job done, but also, the way items are set up + the placement of equipment can make a big difference in how long the process takes.
This is the first part of our 5 part How to Process Meat Chickens series, and I’ll be sharing with you all the equipment and tools we use, how we set up our system to be ergonomic & efficient, plus some extra things you may not have thought about to make your chicken processing day go smoothly!
I highly encourage you to check out the other videos and posts in this series that I will be linking below for the full picture on how processing day works on our homestead!
How to Process Meat Chickens series
- Meat Chicken Processing Set Up, Equipment, and Tools
- How to Quickly Dispatch a Chicken
- How to Remove the Feathers From a Chicken (Using a Scalder and Plucker)
- How to Butcher and Gut a Chicken
- How to Use Poultry Shrink Bags for Freezing Meat Chickens
What equipment do you need to butcher a chicken?
It’s important for me to state that people have been processing chickens for food without special equipment for a very long time. You do not NEED any of this equipment and would be able to get the job done with a knife, a large pot, and your hands to pluck the feathers. However, having some of the equipment listed in this post will allow for processing more meat birds at a time + make the day more enjoyable…which means you’ll be more likely to continue raising your own chickens for meat in the future!
So what items do we like to keep on hand for our chicken processing set up?
This post contains affiliate links marked with an *, which means I make a small commission at no extra cost to you. Thanks for supporting our homestead!
Processing Cones
These are upside down cones that the chicken is placed into to hold them still for dispatching. The ones we use* are metal and have held up over many rounds of meat birds quite nicely. We keep ours permanently fixed to some fence posts on our property, but you could also mount them to the side of an outbuilding if you’d rather. We like these cones because they keep the bird upside down and calm for the dispatch, which means that it’s easier for us to get a clean cut for a quick end for the chicken.
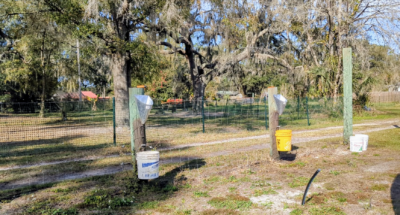
Buckets
You’ll want to place a bucket underneath each processing cone with a small amount of water in each bucket. This will catch the blood from the chicken after the dispatch cut, and you can then transfer that blood to your compost pile.
Scalder
The scalder* is essentially a large stock pot hooked up to a propane burner. After the scalder pot is filled with water and heated to the correct temperature, the meat chickens can be submerged for a short amount of time after they are completely bled out. This process loosens the feathers and makes them much easier to remove during the plucking stage.
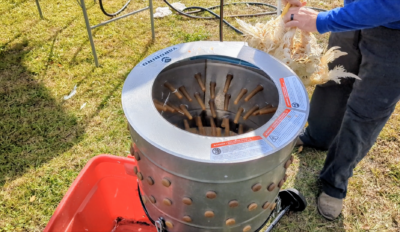
Plucker
If there is any piece of equipment that I wouldn’t want to process meat chickens without…it’s the plucker*. This takes away the need to remove each feather from the bird by hand! After scalding, the bird is placed into the plucker which spins and removes the feathers with rubber “fingers”. This only takes seconds to do, and it greatly decreases the time of the entire chicken processing day. I can’t overstate how much we love having a plucker!
Container for Feathers
When you use a plucker, feathers will be spitting out the bottom, so you’ll need a container to catch those feathers. Any old bucket or tote you have laying around will work. The feathers can be added to your compost pile along with the blood.
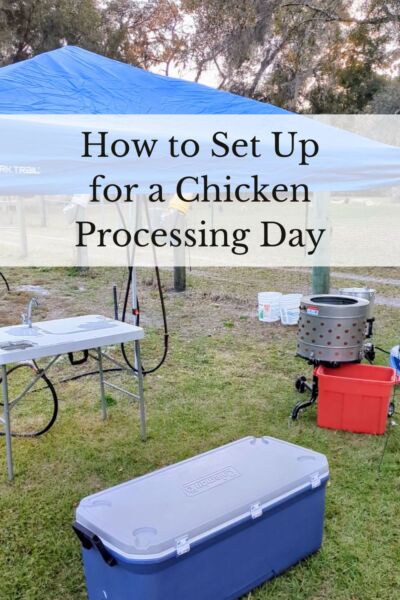
Canopy
If you’re processing meat birds outside, having some type of canopy for shade and protection from rain is very helpful. We didn’t have this at first, so it’s definitely not necessary, just nice to have. This one* is similar to the one we have.
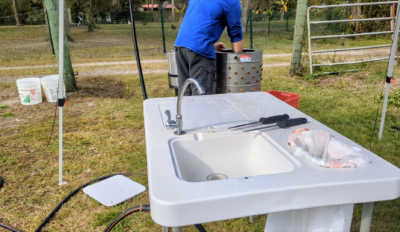
Game Table
You’re going to need some sort of surface on which to gut the bird, and we really like using a game table*. (The one we have seems to always be out of stock now, but this one looks really similar!) This table is large enough for two people to be working at the same time, and has a place to hook up a hose to be able to use the sink feature. This feature is really important when it comes to thoroughly rinsing the chickens prior to putting them in the cooler. You can use any sort of table that is easy to disinfect, but we really like this one!
Cooler & Ice
Once you’re finished processing the meat chickens, you’ll need a space to chill them. We have done this in the refrigerator for a few days, in a large sink filled with ice, and in a large cooler filled with ice. The cooler method is our favorite because it keeps the entire operation outside which keeps messes out of the house! This cooler* is very large and holds can easily hold 20+ meat birds.
We normally process about 25 meat chickens at a time and end up needing 60-80 pounds of ice to keep them chilled for the 3-6 hours until we shrink wrap them.
Shrink Wrap Bags
Our preferred method of freezer storage for meat chickens is to use shrink wrap bags*. I have seen other people use freezer Ziploc bags or vacuum seal bags, but this is what we have always done. It’s easy, and the birds store well in the freezer for quite some time!
Thermometer
A thermometer is necessary to be able to check the water temperature of the scalder to ensure it’s not getting too hot or too cold. Any meat thermometer you have should work just fine!
Lighter and Propane
You’ll need some propane to power your scalder, and you’ll also need a lighter with a long neck in order to light that propane tank. This is another item that seems so simple, but it’s so easy to overlook.
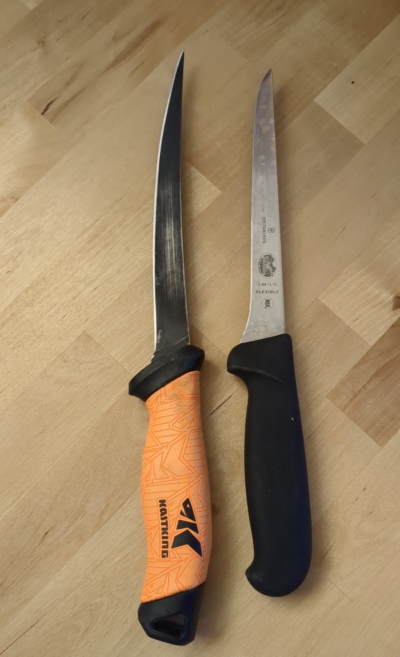
Knives and Knife Sharpener
Having good knives is crucial to ensuring that your cut for dispatch is clean and quick for your meat chickens. We use this fish fillet knife* for the actual dispatch, and we really like this straight flexible boning knife* for the butchering process. We keep two of the boning knives on hand in case we have someone helping with the gutting and butchering on processing day.
I mention the knife sharpener that we use up above in the video, but the sharpener has since stopped working. Because of this, we wouldn’t necessarily recommend that specific sharpener anymore. But you will need a way to ensure that your knives are very sharp!
Trash Bags & a Bowl
There will be parts of the meat chickens that you might want to keep (organs, necks, feet, etc.), and there will be other parts that you might not want to keep. Having a large bowl or container on hand + trash bags will allow you to easily separate those parts as you are butchering. Again, this is a super simple thing but easily forgotten.
This is all the equipment that we find to be really helpful when processing chickens for meat! You don’t NEED all these things, but we have found them to make things much more enjoyable and efficient. Is there anything you would add to the list? Comment below if you have any questions, and make sure to take a look at the other posts in this series!
- Meat Chicken Processing Set Up, Equipment, and Tools
- How to Quickly Dispatch a Chicken
- How to Remove the Feathers From a Chicken (Using a Scalder and Plucker)
- How to Butcher and Gut a Chicken
- How to Use Poultry Shrink Bags for Freezing Meat Chickens
Thank you both for creating this content and sharing it for free. I purchased the chicken tractor plans and my husband and I are currently building it. Excited to complete and get our hens in there! Thanks again.
Thank you so much for trusting us with your tractor build! I am so happy to hear that this resource is helpful for you! :)
Your information is very helpful but I would like to know at what temperature the water for the scolding pot needs to be?
The temperature needs to be around 145 degrees F :)