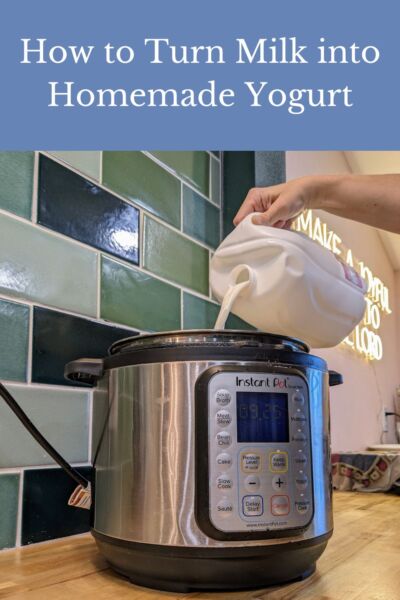
How to Make Yogurt in the Instant Pot
How to Make Yogurt in the Instant Pot
Chicken Tractor Build Plans
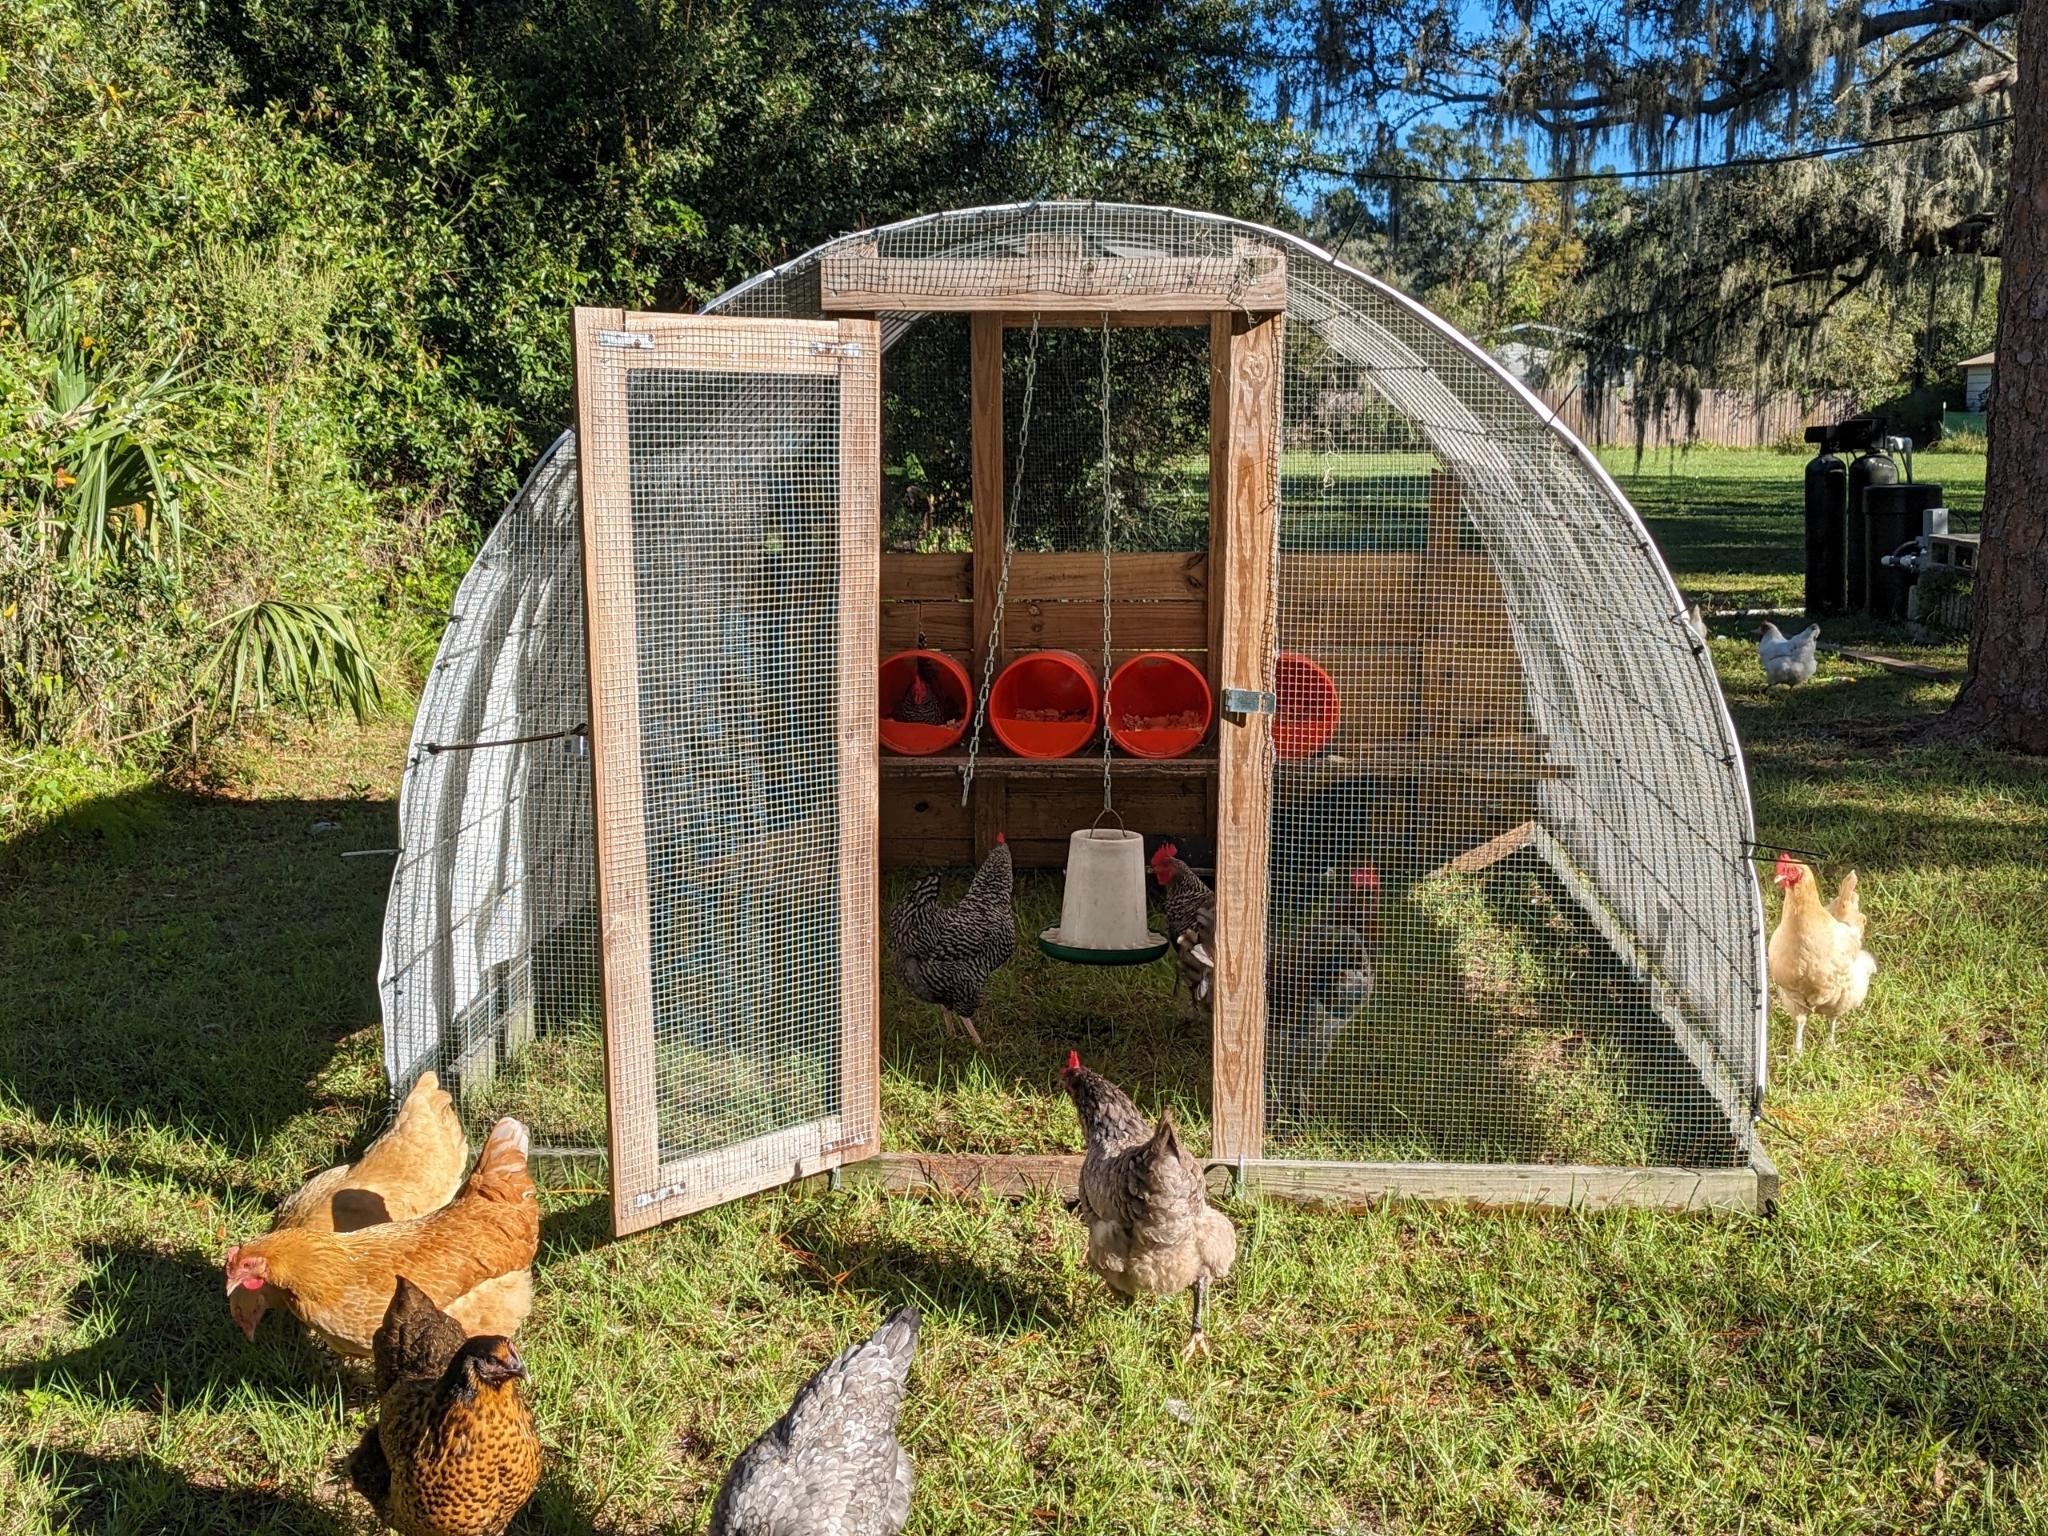
Click here for the plans to build our 8ft x 10ft chicken tractor – perfect for egg layers or meat birds!
Hi, I’m Carisa!

Come along with our family as we learn more about homesteading & self sufficiency as we go.
Once you make homemade yogurt, you’ll never go back to store-bought again! Making Instant Pot yogurt couldn’t be easier. You’ll be wondering why you haven’t tried this sooner!

This post contains affiliate links marked with an *, which means I make a small commission at no extra cost to you. Thanks for supporting our homestead!
What equipment do you need?
- milk (preferably whole)
- store-bought plain yogurt
- Instant Pot (with yogurt function)*
- cooking thermometer*
- lid for the instant pot insert*
- yogurt strainer (optional but I LOVE mine)*
Why use the Instant Pot?
To be fair, I’ve always used the Instant Pot for making yogurt, but I know many people have had success with a slow cooker or even the oven. People definitely made yogurt before the Instant Pot was a thing, so it can definitely be done! I prefer using the Instant Pot because it basically regulates the temperature for you, meaning that you can kind of set it and forget it until the next step!
How long does it take to make yogurt?
Making homemade yogurt will take about 24 hours from start to finish, but the hands on time is 5-10 minutes at most. That’s why this is so easy!
What type of milk should you use?
I have always used whole milk for this recipe because that’s what my family drinks, and I think it makes the yogurt so so creamy. I also don’t buy anything fancy… just your regular whole milk you can find at your grocery store works just fine. You can definitely experiment with different types of milk to see how you like it, but your results may vary.
What type of store-bought yogurt should you use for the starter?
My favorite brand for starting the initial batch of yogurt is plain Fage 5% fat yogurt. I usually just get the little single serve container, and that is enough to start two batches of yogurt. I prefer the Fage brand because of the option to get the higher fat content yogurt, and therefore (it seems) an ever so slightly creamier result.
Truly, most plain yogurts you find at the grocery store will work well – the main thing you need to ensure is that the yogurt is unflavored and has active live cultures in it. This yogurt is going to act as the starter to jumpstart your own yogurt, so it needs to be “alive”. You can easily check this by looking at the ingredient label on the back of the yogurt container.
Can you re-use your homemade yogurt as a starter for the next batch?
Yes! This is one of the best parts about making your own yogurt at home! The whole process becomes very cost effective because the only thing you’ll need to buy is milk the next time you want to whip up a batch of yogurt.
To reuse your own starter, just save about 1/4 cup of the yogurt after the process is complete but BEFORE you have sweetened it, if you choose to do so. Save that reserved portion in the fridge to use as your starter the next time you want to make some Instant Pot yogurt. So easy!

Can you flavor the yogurt?
Absolutely! Some of our favorite things to add are maple syrup or honey and vanilla. You can also add berries, jam, or just wait to flavor each serving as you make it. The most important thing is to wait until after the chilling and straining stage (if you’re choosing to strain your yogurt) before adding flavoring. If you don’t wait, you’ll lose some of your mix-ins with the whey as it is being strained off.
For flavoring an entire batch of yogurt with honey or maple syrup, I usually add 1/4 cup of either for a half gallon of milk & 1/2 cup of honey or maple syrup for a full gallon of milk. Add a splash of vanilla if you choose, and then whisk that into the whole batch after straining!
How long does homemade yogurt last in the fridge?
We have never actually had any yogurt go bad because we eat it up pretty quickly, if I’m being honest. I have definitely had the set aside starter portion in the fridge for at least 2 weeks before! I would say you’re good to go if you consume it in that time frame, but just keep an eye on how it looks, smells, and tastes to guide you since we all keep our refrigerators at different temperatures.
How to Make Instant Pot Yogurt
Let’s get to the actual making of the yogurt, shall we? Now, I’m not a recipe blogger…just a homesteading mom who has been making this yogurt for over 5 years. This recipe may not be as polished as other things on the internet, but let’s just pretend like we’re hanging out in the kitchen, and I’m chatting with you about how to make it. :)
- Start with a clean instant pot insert. We are culturing bacteria here to make the yogurt, so we don’t want to introduce any bad bacteria to the mix by not starting with clean items. Sounds self explanatory, but I want to make sure to mention it anyway.
- Remove the silicone ring in the lid of the instant pot. This ring holds a lot of smells from cooking other dishes, and those smells can impact the taste of the yogurt. We aren’t bringing the Instant Pot up to pressure, so it’s not necessary to have it on the lid.
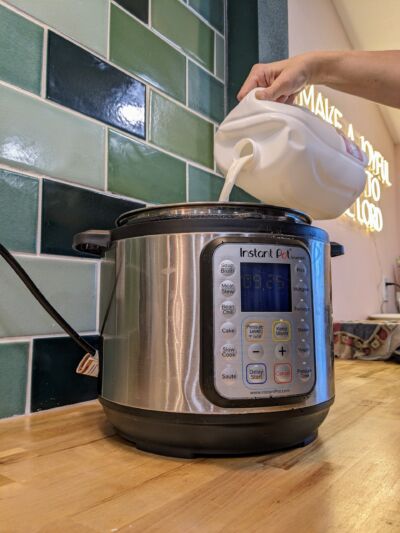
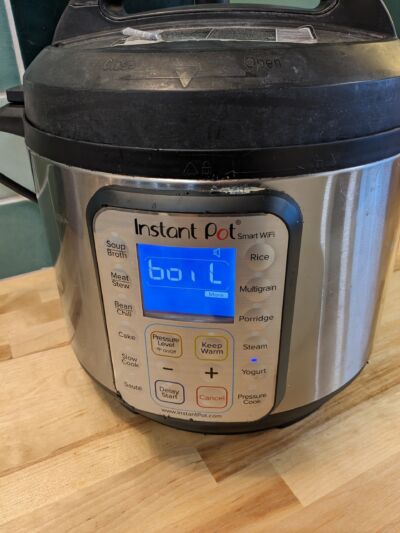
- Pour 1/2 gallon or 1 full gallon of milk into the Instant Pot insert, place the lid on the Instant Pot, and press the boil button. This function will bring the temperature of the milk up to about 180 degrees. You can also achieve this by leaving the lid off, using the sauté function, and constantly whisking until the milk reaches 180 degrees. When I use the boil button, this takes anywhere from 30 minutes to an hour.
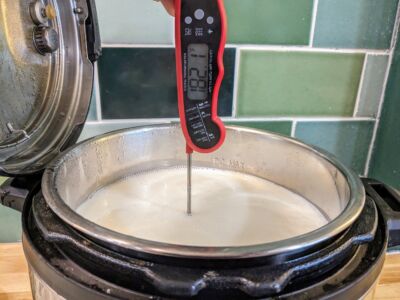
- Once the milk reaches 180 degrees, take the insert out of the Instant Pot and place it on a heatproof surface. Our goal is to get the milk to cool to about 110 degrees. This takes 1.5 hours to 1 hour 45 minutes for me depending on the temperature of my house.
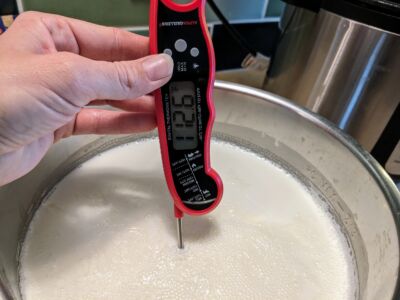
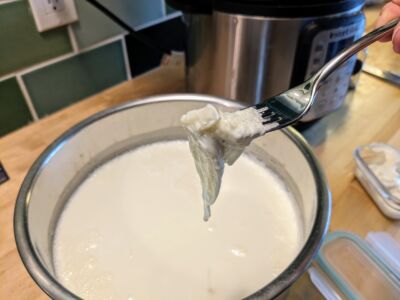
- When the milk is cooled to around 110 degrees, use a fork to remove the “skin” that has developed on top of the yogurt. Whisking this in would make small lumps in the yogurt, so we want to remove it.
- Whisk in about 2 tablespoons to 1/4 cup of yogurt starter to the cooled milk. For half a gallon of milk, I would go for the smaller amount of starter and add about 1/4 cup of starter if using a full gallon of milk.
- Put the insert back into the Instant Pot, add the lid, and press the yogurt button until it reads 8 hrs. This will keep the milk and starter at temperature for the 8 hours to do it’s yogurt-making thing, and you can go live your life!
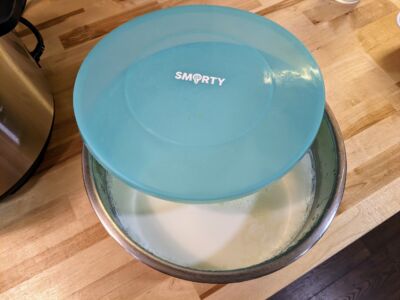
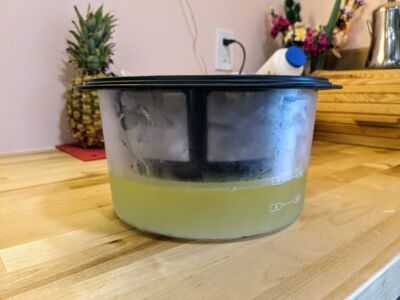
- At the end of the 8 hours, take the insert out of the Instant Pot. It’s time to chill the yogurt overnight in the fridge to let it thicken up before straining or adding flavoring. I use a silicone lid* to cover the insert for this part.
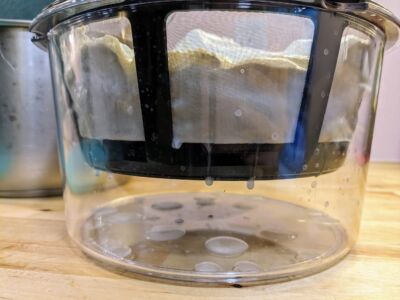
- After the yogurt has chilled in the fridge and thickened, now is the time to strain or flavor. For years we didn’t strain the yogurt at all and enjoyed a thinner texture. But if you’re going for a more Greek yogurt type of texture, I highly recommend straining. This is the strainer* we have, and I love it! If you choose to strain, just keep it in there until its your desired thickness. It’s an art, not a science at this point.
- Make sure to save a small portion to use as the starter for your next batch before you sweeten or flavor! Enjoy!
Once you learn to make Instant Pot yogurt, it will quickly be one of those recipes that you don’t even need to think about! I’ve been making this yogurt for my family for years. I always eyeball it, I don’t always get the temperatures exactly right, I don’t always get the measurements exactly right…but the yogurt always turns out just as delicious! I hope this post gives you the confidence to make your own Instant Pot yogurt. It saves so much money, and is so much more delicious than store-bought!
Have you tried making yogurt in the Instant Pot before? Give this “recipe” a try, and let us know in the comments how it goes for you!
My family LOVES this yogurt recipe! I will NEVER buy store bought yogurt again! It’s so simple and easy, too.
I am so happy to read this!
I had no idea that a gallon of milk would make the whole gallon of yogurt bc usually things cook down and you end up losing some… I didnt see the part on straining, and so it ended up like a yogurt smoothie… I originally made it for my client who is currently bed riden, and she loves it with a little bit of strawberries and stevia… I also tried and my family and they like it… So excited its edible… Lol
Oh yes, definitely edible! And now you can play around with straining and see what texture and thickness you family likes best :)
Can you do this in an insta pot that doesn’t have the yogurt buttons?
You can do it in a bunch of different ways as long as you have a way to maintain the temperatures!